One of the most common problems with bathtubs that probably everyone might have faced at some point is the formation of a dip at the bottom of the tub. There can be many reasons behind a dip in a bathtub, such as improper cleaning and incorrect installation.
So, how to fix a dip in a bathtub? The repair process involves several steps that include identifying the dip, filling it with spackling paste, sealing it with satin glaze, and letting it dry for a few days.
Read on to find out more about fixing a dip in a bathtub and the causes behind this problem. Happy reading!
What Causes a Dip in a Bathtub?
There can be several reasons for a dip in your bathtub. Diagnosing the cause of the dip correctly is an important step in fixing the problem. Here, we’ll go over the three main causes behind a dip in a bathtub.
Incorrectly Cleaning the Bathtub
Incorrect cleaning practices are perhaps the major reason behind a dip in a bathtub. Dips on the bottom of the bathtub can be easily caused by dirt, soap, or other debris accumulating on the surface. If these substances build up over time, the dip can get worse.
A Leak in the Bathtub
Another common cause of a dip in a bathtub is a leak. Dips can also be caused by a leak that has gone undetected for a while.
Improper Installation
Incorrectly installing a bathtub can also cause a dip to form on its surface. Installing a bathtub on an uneven surface can cause water and other debris to accumulate on the bottom and a dip may form as a result.
Quality of the Bathtub
Besides these main reasons behind a dip in a bathtub, another thing to factor in is the quality of the bathtub. Dips can form more easily in cheap bathtubs due to the poor quality of construction. So it is always wise to invest in a good quality bathtub that isn’t highly vulnerable to dips and other problems.
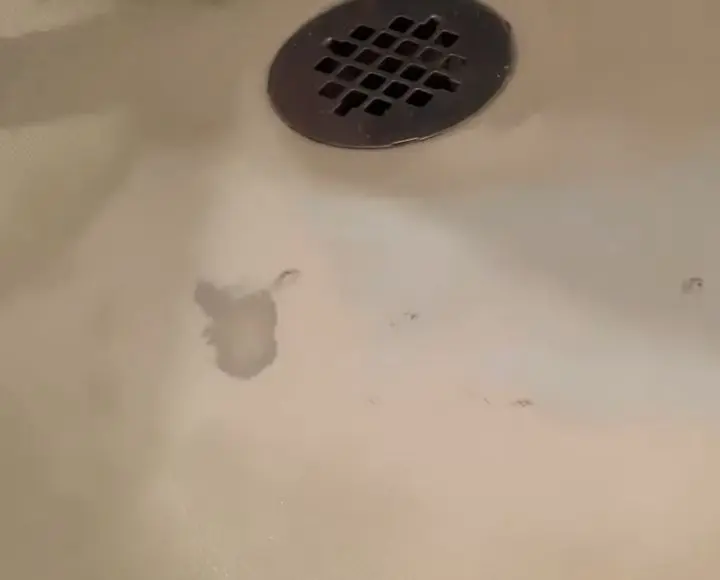
How to Determine if Your Bathtub Has a Dip
If you think there might be a dip in your bathtub, you should first determine if it is actually there so that you can repair it. The easiest way to do that is to see if water is accumulating in any part of the tub.
Once you know the location of the dip, you can take a few measurements to get an idea of how deep the dip is. These measurements can also aid you in the repair process.
How to Fix a Dip in a Bathtub – Step-by-Step
Fixing a dip in a bathtub involves several steps. While you can always call in a repair service to do the job for you, the repairs might be expensive in certain cases. Here, we outline the steps you can follow to fix a dip in your bathtub yourself.
Step 1 – Determine if the Dip is Serious
The first step in fixing a dip in your bathtub is determining if it is serious enough to be fixed. While this might seem unnecessary, it is important to do it since small dips might not be worth repairing. However, if your tub has a large and serious dip, then fixing it is important.
Step 2 – Mark the Area Around the Dip
Once you have decided to go ahead with the repair, the next step is to mark the area around the dip. Use a marker to mark the entire area around the dip. In this step, it is crucial to mark the area around the dip correctly since an incorrect marking can create problems during the repair process.
Step 3 – Fill in the Dip
The third step in fixing the dip in your bathtub is to fill in the depression. To fill the dip, you’ll need to apply spackling paste smoothly and evenly. Apply the paste using a gentle dabbing motion so that it fills the dip evenly.
Once the dip is filled in, you can remove the excess paste using a sponge. Leaving excess paste on the surface of the bathtub can lead to the formation of unwanted bumps and ridges.
Step 4 – Apply a Bit of Satin Glaze
Once you’ve filled in the dip using spackling paste, the next step is to apply some satin glaze on top of the dried spackling paste. Make sure the spackling paste has fully dried before applying the glaze. The glaze acts as a sealant and completes the repair process.
Step 5 – Let the Area Dry
The fifth and final step in the repair process is drying the newly repaired dip in your bathtub. This step is very important and shouldn’t be skipped at all.
After the dip has been filled and sealed with spackling paste and satin glaze, allow it to dry for at least 2 to 3 days. Only use the bathtub after you’re sure the area has dried properly. Once the area has dried completely, you can use sandpaper to sand it down.
Conclusion
A dip in a bathtub is a very common problem that can occur due to a variety of reasons. These include improper installation and incorrect cleaning practices – in addition to other causes.
Fortunately, the repair process is fairly straightforward and easy – for the most part. It involves identifying the dip, filling it in, sealing it, and then letting it dry for a few days before using it again.