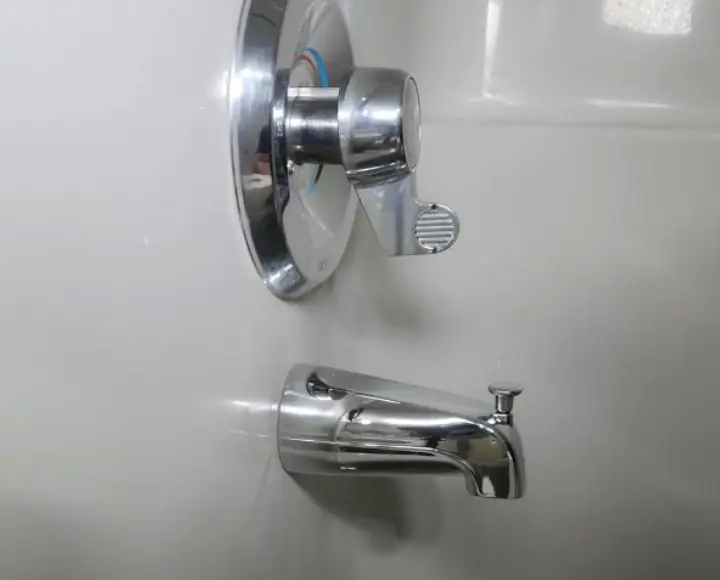
Does your tub spout fail flush against the wall as it should? The problem is common with new or old houses. Three issues may be the genesis of the problem. The bathroom wall may be uneven, you may have installed the wrong sprout, or it is not fixed properly.
The issue should, however, not be of major concern since it is minor and easy to fix. Regardless, it is essential you resolve the situation as soon as it is discovered to avoid damaging the bathroom walls.
Below are different ways to fix tub spouts that won’t flush with the wall problem;
Start By Determining the Type of Tub Spout You’ve Got
There are at least two types of tub spouts; slip-on and threaded spouts. The two types are easy to install, maintain, and repair if malfunctioning. The only difference between a slip-on and a threaded tub spout is how it is secured on the bathroom wall.
To determine the type of tub spouts you have, use a flashlight to check its underside. Do so while the tub spout is still secured on the wall. You may find or not find screws underneath the sprout.
A slip-on spout is secured onto the wall with a setscrew., If the tub spout is not fixed with any screws, it is a threaded spout. Threaded sprouts are threaded/screwed directly into the pipe on the bathroom wall.
The Process of Uninstalling a Tub Spout from a Nipple/Pipe
Below is how to uninstall a slip-on and threaded tub spout;
Slip-on tub spout
This type of spout is made to fit into a ½” copper pipe. It does not have threads. Instead, it is secured to the wall with setscrews.
To uninstall the slip-on spout, follow the steps below;
- Use a putty knife or a razor to remove any caulking around the tub spout where it is secured on the wall
- Check where the set screw is located on the underside of the spout. It should be near the wall. If it is dark, you may use a flashlight for better visibility
- Use the appropriate wrench to loosen the screws. You can unscrew most spout screwsets using a hex/Allen wrench. You may also use a small Phillips head or flathead screwdriver
- Be careful not to drop the tiny screw into the drain. As a precaution, you may place a washcloth over the drain before you loosen the screw to trap it if it drops
- When the tub spout is loose, use both hands to pull it from the copper wire sticking out from the wall. Twist and pull the spout gently so as not to loosen pipe connections in the wall. Be sure the setscrew is loose entirely, and the tub sprout is not stuck before you twist and pull it out. Too much jarring may damage the plumbing within the wall
Tub spout with threads
A threaded spout comes in two types. It is either a front-end or a rear-end style.
The front-end spout has threads located near the spout and requires a longer pipe to install. A rear-end tub spout threads are situated near the wall. You will need a shorter pipe to install the rear-end spout.
Uninstalling a tub spout (threaded) is easy. You will follow the steps below to unscrew from the nipple.
- Have a large wrench to unscrew the spout
- Before you loosen the spout, check if it is stuck or corroded. If rusty, apply lubricant around it, and let it be for some time to make it loose. It will open easily
- Secure the wrench over the tub
- Turn the wrench anti-clockwise to unscrew
Tub Spout not Flush with the Wall? 3 Ways to Repair
One cause of tub spout failure to flush with the wall problem may be due to an installation issue. If you have installed the wrong spout or the pipe nipple is longer than the required installation length.
Explained below are methods you may use to fix a tub spout that won’t flush:
Cutting the nipple pipe
Follow the steps below to cut the nipple:
- Take the measurements to establish how long the nipple should be. Measure the distance between the screwed end of the spout to the wall
- Use a wrench to unscrew the tub spout from the nipple pipe
- Take measurements, and mark all around the nipple to ensure the tub spout installations and the gap from the wall are equal
- Use a tubing cutter to cut the nipple to have smooth edges. Avoid using a hacksaw, as it may leave rough edges
- Screw or thread the tub spout into the pipe nipple till it flushes against the wall. If you are repairing a slip-on spout, use a flathead screw or a set screw to tighten the spout. For threaded tub spouts, screw/thread slowly to snug and align it vertically against the wall
Replacing with a shorter threaded nipple
Your tub spout may not flush vertically against the wall if it has a threaded connection that is two or three inches long. If you have a long 3-inch nipple, it is better to use a 2 ½ inches nipple to replace it.
If the tub spouts nipple has a plastic extension nipple of two to three inches threaded connector, replace it with a 1-inch nipple. It will be a perfect fit vertically to flush against the wall.
Use a plate trim
You may use a plate trim to fix a tub spout that has a gap between the spout and the wall after you screw the spout on the pipe nipple.
To install the trim plate, follow the steps below;
- Unscrew and remove the tub spout
- Install the trim plate to fill the gap between the spout and the wall
- Seal the base of the tub spout with some caulking silicone (the trim plate too). This will help protect against mild mold or water damage